Summary
Setting up an online store is your first step towards the entrepreneurial journey. You’re filled with ideas and want to execute everything to ensure the best for your customers.
However, let’s face it: Setting up an online store is more than a technical task; it’s about crafting a unique shopping experience that resonates with your customers. While creating such experiences can be challenging, business owners today can access Adobe Commerce for their online operations.
Adobe Commerce allows business owners to streamline the setup process and align their shops with their unique brand and business goals.
But how do you set up your shop on the platform used by over 200,000 sites?
Let’s find out as we learn more about the platform and store creation in this Adobe Commerce user guide. Continue reading in the following sections as we learn more about how to set up your store.
What is Adobe Commerce?
Adobe Commerce is an open-source eCommerce platform that enables retailers to create flexible online purchasing systems. It lets them display things depending on their preferences and customize website functionality using gut instinct or analysis. Partnering with an AEM implementation partner can further enhance this platform’s capabilities, ensuring seamless integration and optimized performance. Its catalog management, discounting options, and robust marketing help businesses scale.
Why Adobe Commerce for Your eCommerce Platform?

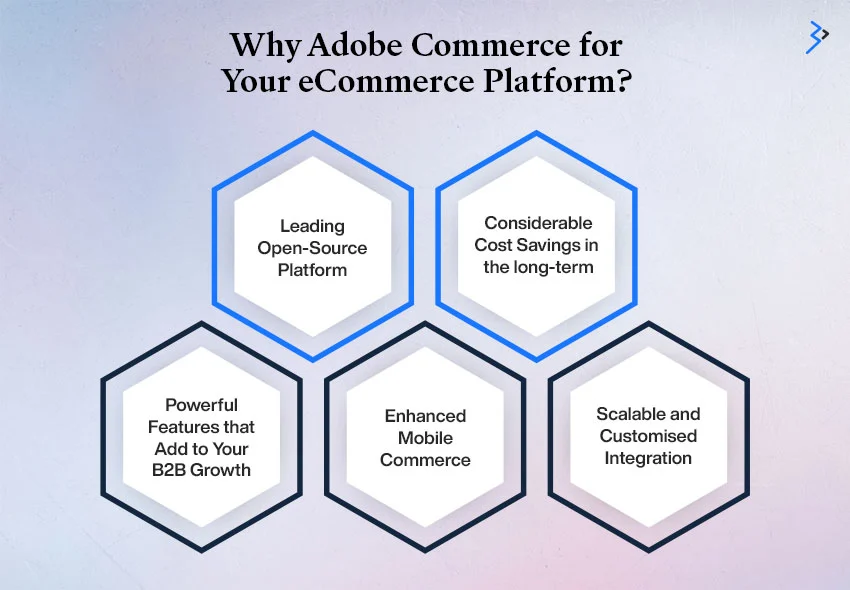
Here are a few features that make the Adobe Commerce platform unique and why business owners should choose it:
- Adobe Commerce is a Leading Open-Source Platform:
Adobe Commerce has proven to be the best platform for B2B organizations due to its open-source nature. It allows you to adapt your web development concepts. This platform provides developers with a unique collection of themes, extensions, and connectors connecting Adobe Commerce to other business services.
- Considerable Cost Savings for the Long-Term:
Adobe Commerce might be an excellent investment because it allows you to save money over time. It successfully cuts costs by integrating more order fulfillment capabilities.
- Powerful Features that Add to Your B2B Growth:
This platform has numerous unique features, including catalog modification, mobile commerce, tailored pricing lists, and site management.
How To Make An Easy eCommerce Store?

Prerequisites
To get started with your eCommerce journey, you must meet the following prerequisites:
- Have an Adobe Commerce account.
- Don’t have an account? Try creating a free Adobe Commerce account.
Step 1: Make Sure You Have All the Requirements
Adobe Commerce has particular criteria that must be met by the server that hosts the platform.
So, before you choose a hosting provider and store management services for your eCommerce store creation, ensure you meet all these requirements. The following are the criteria for utilizing Adobe Commerce:
- Operating System: Linux distributions and x86-64, such as RedHat and Ubuntu. Locally produced on Windows or Mac, using virtualization or MAMP programs.
- Memory: The setup requires having a minimum of 2GB RAM or more.
- Web Server: You can use Apache or NGINX as your web server.
- PHP: We recommend using PHP 7.3.
- Database: Use a database compatible with 5.7 and 5.6 versions of MySQL.
- Security: You must buy an SSL certificate for secured data transfer and PayPal integration.

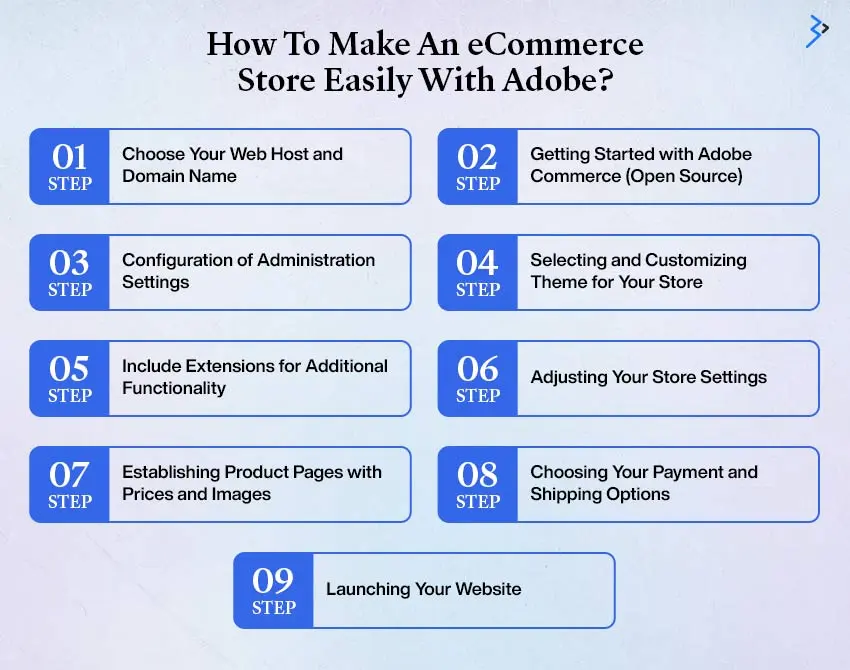
Step 2: Choose Your Web Host and Domain Name
The next step is to choose a Web Host that will best meet your specific needs. In this regard, you should select a web host that supports the platform you intend to employ. DreamHost, Bluehost, and Hostinger are three prominent hosting providers that provide simple Adobe Commerce installation choices.
After choosing the best Web Host, you must register a domain for your website. You can hire the greatest Amazon virtual assistant to help you with this.
Step 3: Getting Started with Adobe Commerce (Open Source)
After selecting a hosting plan and creating your account, you must install the Adobe Commerce Open-source.
Follow these steps to get started:
- Go to the product page and press the “Get Started” button.”
- You can find a feature comparison table for this open-source (Adobe Commerce) platform.
- Finally, select the option “Download Open Source”.
You will now be sent to the Adobe Commerce Tech Resources website, where you may download the Adobe Commerce Open Source. You may use Composer for this. You can choose whether to download it with or without the example data.
If your host allows it, you may install Adobe Commerce Open Source with a single click. To do this, navigate to “cPanel” and choose “Auto installers”. After tapping the Adobe Commerce icon, the installation begins with customizing all administrative options.
Step 4: Configuration of Administration Settings
Before installing other aspects of your store and the Adobe Commerce payment services, only set up your admin credentials and specify the server path. After installation, select the “Administrative URL” and log in with your login and password credentials.
You’ll now be in your Adobe or Magento Commerce dashboard, where you can build your e-commerce website. You may get additional information from an organization that provides best-in-class Adobe Commerce store management services.
Step 5: Selecting a Theme for Your Store
The next step is to choose and install a theme for your business. You should be careful while selecting this because it defines the appearance of your shop. Access keys are required to download and install marketplace themes.
You can follow these instructions to get the access keys by following these steps:
- To find “Access Keys,” go to “Marketplace” and then “My Products.”
- You may create new keys and give them new names, particularly on the “Access Keys” tab.
- Once you’ve copied your private and public keys, head to the dashboard’s “Setting” section.
- Select “Extension Manager” from the “Web Setup Wizard” in the options.
- After that, you need to input the keys that you have copied into the
Read More: Using Adobe Commerce for B2B eCommerce: Features You Need to Know
Once you’ve connected your website admin panel to Adobe Commerce Marketplace keys, you can see all of the extensions or themes you purchased in the Extension Manager.
Step 6: Customizing Your Chosen Theme
Once the theme has been installed, you can access it through “Configuration” in “Contents.” You can modify the theme using the customization interface. You can include whatever aspects you like and your brand’s logo, depending on your needs. To update your Blocks, Web pages, and widgets, navigate to “Elements” in “Content.”
Step 7: Include Extensions for Additional Functionality
You can install an extension for Adobe Commerce analytics from the marketplace to include better functionality. These extensions may contain everything from Instagram widgets to checkout choices.
To add an extension to your site, consider following the same procedures as adding a new theme. You can filter Adobe Commerce extensions on the marketplace based on parameters such as pricing. Once you’ve decided on one, you can download it for installation.
Step 8: Adjusting Your Store Settings
The next step is to edit your e-commerce store’s settings. Please complete this step before adding items to your store.
To do this, go to “Stores” and then select “Configuration” from “Settings.”
- Ensure you combine all of these details:
- The email address for the transaction notice.
- Payment and delivery choices.
- Timezone, location, and currency options.
- Customer account settings.
- Choose either [Website] or [Global] pricing scope.
Once you’ve made your changes, simply hit the “Save Config” button to see them take effect.
You must use Shopify product store administration services if you have a Shopify store.
Step 9: Establishing Product Pages with Prices and Images
Set up your Magento (Adobe Commerce) store’s products page with goods, photos, and pricing.
- To do so, navigate to the “Catalog” and select “Products” from the list of available items.
- After that, press the “Add Product” button to add that product to your product page.
- Then, click the “Save” button in the upper right corner.
- When ready to go live with your items, ensure the “Product Online” switch is turned on.
You can use their shop management services for help with Adobe Commerce. In this instance, using eCommerce product data entry services is a wise choice.
Read More: How to Use Generative AI to Its Full Potential in Your Adobe Commerce Store
Step 10: Choosing Your Payment and Shipping Options
Adobe Commerce provides a wide range of shipping and payment alternatives.
- You may find them on the “Configurations” page of “Settings”.
- Payment choices are shown under “Sales” in the left sidebar menu.
- From there, you can use Adobe Commerce to set the payment method.
- In this scenario, you may even use extensions to provide more alternatives for your consumers.
The list of parameters allows you to specify each available payment gateway. Please specify your card type and if you wish to keep credit card information for future purchases.
Step 11: Launching Your Website
The final step is to launch your website. However, you should preview your website before releasing it to avoid having to change the live site.
- When building or modifying your site, use a staging environment or a local location.
- Then, consider pushing it to your server.
- If you built your website locally, upload all your Adobe Commerce files to your host.
- You may accomplish it using your local development program or an FTP (File Transfer Protocol) client.
Once done, it’s time to go live and scale your business! However, don’t forget Adobe Commerce’s product recommendation while you’re at it. It allows you to suggest new products to your users and improve chances of sales and conversion.
Read More: Go Composable with Adobe Commerce
Different Methods You Could Be Using to Setup Your Adobe Commerce Store

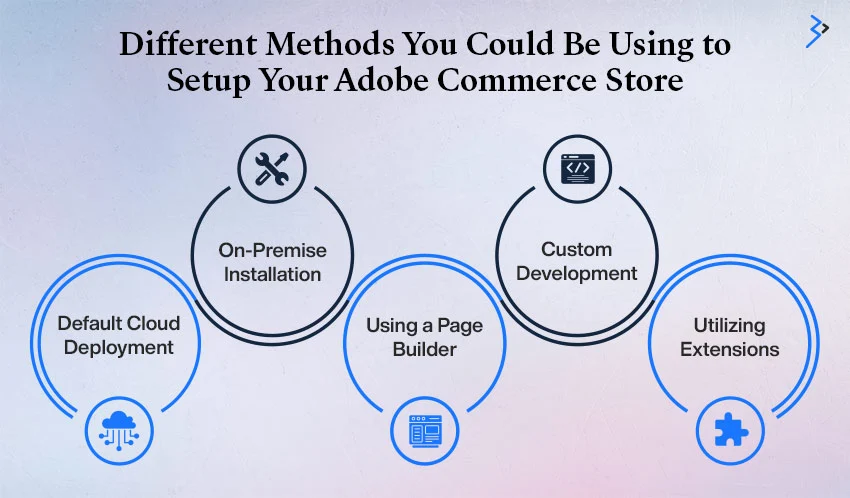
There are various techniques for creating an Adobe Commerce shop. Each caters to varying degrees of customization, technological skill, and commercial requirements.
Let’s have a closer look at some of the techniques you might want to consider:
1. Default Cloud Deployment
Adobe Commerce delivers a cloud-based solution called Adobe Commerce on Cloud, a managed service that provides powerful cloud hosting optimized for security and performance by Adobe. This approach includes:
- Using Adobe’s infrastructure for rapid deployment.
- Scalability is built in, as are strengthened security measures.
- Adobe manages maintenance, updates, and fixes.
2. On-Premise Installation
On-premise installation is for enterprises that need total control over their environments due to security, regulatory, and performance requirements.
This approach includes:
- Complete control of the hardware and software environments.
- The servers may be custom-configured to fulfill specific requirements.
- Manage your security processes to ensure that they meet industry laws.
- Servers are managed in-house, including setup, maintenance, and upgrades.
3. Using a Page Builder
Adobe Commerce’s integrated Page Builder enables drag-and-drop editing, making it simple to build and personalize your store without much technical knowledge.
- Simplify the construction of unique pages.
- Ensure your information appears appealing on all devices.
- Schedule content and preview changes and updates with ease.
4. Custom Development
Custom development utilizing Adobe Commerce’s comprehensive APIs may modify every part of the eCommerce experience to meet specific business needs beyond what is available.
- Collaborate with professionals to create customized functionality.
- Integrate features that are unique to your business model or sector.
- Connect deeply to CRM, ERP, or custom back-end systems.
5. Utilizing Extensions
Using Magento Marketplace plugins, you may extend the functionality of your Adobe Commerce shop. This method can add certain features without the requirement for bespoke development:
- Add powerful SEO tools, customer loyalty programs, or customized delivery options.
- The majority of extensions are quick to install and configure.
- Use extensions with solid support and regular updates to ensure the best compatibility.
Final Thoughts
We hope you have discovered many vital facts regarding Adobe Commerce. With this knowledge, you should explore using this platform to launch your e-commerce site.
However, if you’re confused by the how-tos, we suggest contacting professionals who provide experienced Adobe Commerce store administration services. They will understand your requirements and may provide you with the finest solutions based on them. All the best!
Related Articles
-
Discover the Latest Features and Updates in AEM 6.6 Release
Adobe Experience Manager Services (AEM) is poised for a significant evolution with the upcoming release of AEM 6.6, also known as AEM 6.5 2025 Edition. This new version will mark
-
Adobe Commerce Security Best Practices: Safeguarding Your Online Store
In the fast-paced digital era, where online shopping has become a norm, the security of e-commerce platforms is of paramount importance. According to recent studies, a staggering 88% of skilled
-
Adobe Managed Services vs. Cloud Services: Differences & Benefits
Summary: In today’s fast-paced digital landscape, deciding on the right service model is critical for businesses that hope to deliver exceptional customer experiences and stay ahead of the competition. Whether


